
RHEL:
https://access.redhat.com/support/policy/updates/errata/#Extended_Life_Cycle_Phase
openSUSE:
English:
https://en.opensuse.org/Lifetime
Chinese:
https://zh.opensuse.org/%E4%BD%BF%E7%94%A8%E6%9C%9F%E9%99%90
SLE:
https://www.suse.com/lifecycle
https://access.redhat.com/support/policy/updates/errata/#Extended_Life_Cycle_Phase
English:
https://en.opensuse.org/Lifetime
Chinese:
https://zh.opensuse.org/%E4%BD%BF%E7%94%A8%E6%9C%9F%E9%99%90
https://www.suse.com/lifecycle
(步骤略)
# mkdir <directory for mounting the image># mount -t iso9660 <image> <directory for mounting the image># mkdir <directory of data for installing the system>(注意:用于存放系统安装数据的目录必须要放在能够实现 PXE 安装时网络共享的目录里(例如:通过 httpd 服务进行网络共享))
# cp -rp <directory for mounting the image>/* <directory of data for installing the system># cp -rp <directory for mounting the image>/.treeinfo <directory of data for installing the system># mkdir <directory of BIOS boot file for installing the system>(注意:用于存放 BIOS 安装引导文件的目录必须要放在能够实现 TFPT 网络共享的目录里)
# mkdir <directory of EFI boot file for installing the system>(注意:用于存放 EFI 安装引导文件的目录必须要放在能够实现 TFPT 网络共享的目录里)
如果是 Rocky Linux & RHEL 的话则拷贝 initrd.img 文件、TRANS.TBL 文件和 vmlinuz 文件:
# curl <The URL of the network share when PXE installing>/<directory of data for installing the system>/images/pxeboot/initrd.img -O <directory of BIOS boot file for installing the system>/initrd.img
# curl <The URL of the network share when PXE installing>/<directory of data for installing the system>/images/pxeboot/TRANS.TBL -O <directory of BIOS boot file for installing the system>/TRANS.TBL
# curl <The URL of the network share when PXE installing>/<directory of data for installing the system>/images/pxeboot/vmlinuz -O <directory of BIOS boot file for installing the system>/vmlinuz
如果是 openSUSE & SLE 的话则拷贝 linux 文件和 initrd 文件:
# curl <The URL of the network share when PXE installing>/<directory of data for installing the system>/boot/x86_64/loader/linux -O <directory of BIOS boot file for installing the system>/linux
# curl <The URL of the network share when PXE installing>/<directory of data for installing the system>/boot/x86_64/loader/initrd -O <directory of BIOS boot file for installing the system>/initrd如果是 Rocky Linux & RHEL 的话则拷贝 initrd.img 文件、TRANS.TBL 文件和 vmlinuz 文件:
# curl <The URL of the network share when PXE installing>/<directory of data for installing the system>/images/pxeboot/initrd.img -O <directory of EFI boot file for installing the system>/initrd.img
# curl <The URL of the network share when PXE installing>/<directory of data for installing the system>/images/pxeboot/TRANS.TBL -O <directory of EFI boot file for installing the system>/TRANS.TBL
# curl <The URL of the network share when PXE installing>/<directory of data for installing the system>/images/pxeboot/vmlinuz -O <directory of EFI boot file for installing the system>/vmlinuz
如果是 openSUSE & SLE 的话则拷贝 linux 文件和 initrd 文件:
# curl <The URL of the network share when PXE installing>/<directory of data for installing the system>/boot/x86_64/loader/linux -O <directory of EFI boot file for installing the system>/linux
# curl <The URL of the network share when PXE installing>/<directory of data for installing the system>/boot/x86_64/loader/initrd -O <directory of EFI boot file for installing the system>/initrd# cd <directory of profile for installing the system>(注意:进入到用于存放系统安装配置文件的目录必须要放在能够实现 PXE 安装时网络共享的目录里(例如:通过 httpd 服务进行网络共享))
如果是 Rocky Linux & RHEL 的话
# vim <BIOS system installation profile>(步骤略)
(
补充:
1) 如果是 Rocky Linux & RHEL 的话系统安装配置文件是 CFG 文件,文件名最好以 .cfg 后缀结尾
2) 如果是 openSUSE & SLE 的话系统安装配置文件是 XML 文件,文件名最好以 .xml 后缀结尾
)
# vim <EFI system installation profile>(步骤略)
(
补充:
1) 如果是 Rocky Linux & RHEL 的话系统安装配置文件是 CFG 文件,文件名最好以 .cfg 后缀结尾
2) 如果是 openSUSE & SLE 的话系统安装配置文件是 XML 文件,文件名最好以 .xml 后缀结尾
)
# chmod 755 <BIOS system installation profile># chmod 755 <EFI system installation profile># vim <directory of file for BIOS system installation menu>/pxelinux.cfg如果是 Rocky Linux & RHEL 的话,添加以下内容:
......
label Rocky Linux or RHEL
  menu label ^Installation Rocky Linux or RHEL
  kernel <relative directory of pxelinux.cfg of BIOS boot file for installing the system>/vmlinuz
  append initrd=/<relative directory of pxelinux.cfg of BIOS boot file for installing the system>/initrd.img ks=<The URL of the network share when PXE installing>/<BIOS system installation profile>
(注意:这里的 vmlinuz 文件和 initrd.im 文件的位置要写 pxelinux.cfg 文件的相对路径)
如果是 openSUSE & SLE 的话,添加以下内容:
......
label openSUSE or SLE
  menu label ^Installation openSUSE or SLE
  kernel <relative directory of pxelinux.cfg of BIOS boot file for installing the system>/linux
  append initrd=<relative directory of pxelinux.cfg of BIOS boot file for installing the system>/initrd splash=silent showopts install=<The URL of the network share when PXE installing>/<directory of data for installing the system>/ autoyast=<The URL of the network share when PXE installing>/<BIOS system installation profile>
(注意:这里的 linux 文件和 initrd 文件的位置要写 pxelinux.cfg 文件的相对路径)
(注意:用于存放 BIOS 系统安装菜单文件的目录必须要放在能够实现 TFPT 网络共享的目录里)
# vim <directory of file for EFI system installation menu>/grub.cfg如果是 Rocky Linux & RHEL 的话,添加以下内容:
......
label Rocky Linux or RHEL
  menu label ^Installation Rocky Linux or RHEL
  kernel <relative directory of pxelinux.cfg of EFI boot file for installing the system>/vmlinuz
  append initrd=/<relative directory of pxelinux.cfg of EFI boot file for installing the system>/initrd.img ks=<The URL of the network share when PXE installing>/<EFI system installation profile>
(注意:这里的 vmlinuz 文件和 initrd.im 文件的位置要写 pxelinux.cfg 文件的相对路径)
如果是 openSUSE & SLE 的话,添加以下内容:
......
label openSUSE or SLE
  menu label ^Installation openSUSE or SLE
  kernel <relative directory of pxelinux.cfg of EFI boot file for installing the system>/linux
  append initrd=<relative directory of pxelinux.cfg of EFI boot file for installing the system>/initrd splash=silent showopts install=<The URL of the network share when PXE installing>/<directory of data for installing the system>/ autoyast=<The URL of the network share when PXE installing>/<EFI system installation profile>
(注意:这里的 linux 文件和 initrd 文件的位置要写 pxelinux.cfg 文件的相对路径)
(注意:用于存放 EFI 系统安装菜单文件的目录必须要放在能够实现 TFPT 网络共享的目录里)
# umount <directory for mounting the image>在创建 KVM 虚拟机之前要先安装 KVM 并创建 KVM 虚拟网络
在 Rocky Linux 官网上下载安装系统所需要的镜像:
https://rockylinux.org/download
主要用于批量克隆出新的 KVM 机器,节约创建新虚拟机的时间
(只在真机上执行以下步骤)
# qemu-img create -f qcow2 /var/lib/libvirt/images/rockylinux8.qcow2 10G(补充:这里以创建 10G 大小的 rockylinux8.qcow2 硬盘文件为例)
(只在真机上执行以下步骤)
# ls /var/lib/libvirt/images/ | grep rockylinux8.qcow2(补充:这里以显示 rockylinux8.qcow2 硬盘文件为例)
(只在真机上执行以下步骤)
# virt-manager(只在真机上执行以下步骤)
(步骤略)
(只在真机上执行以下步骤)
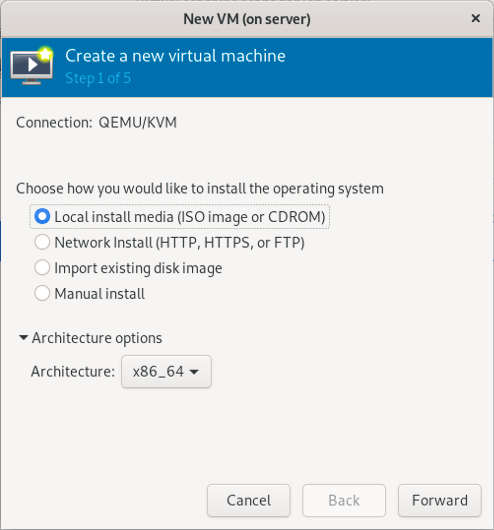
(只在真机上执行以下步骤)
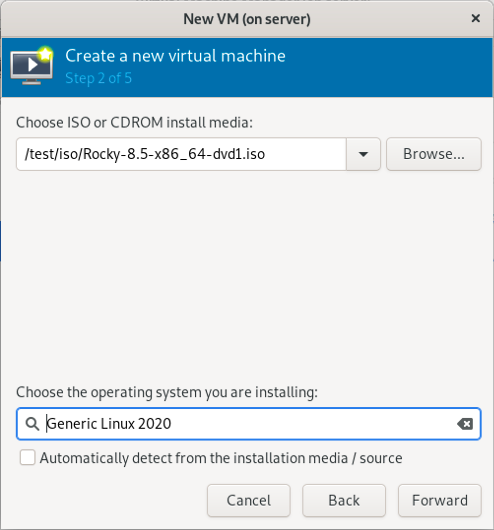
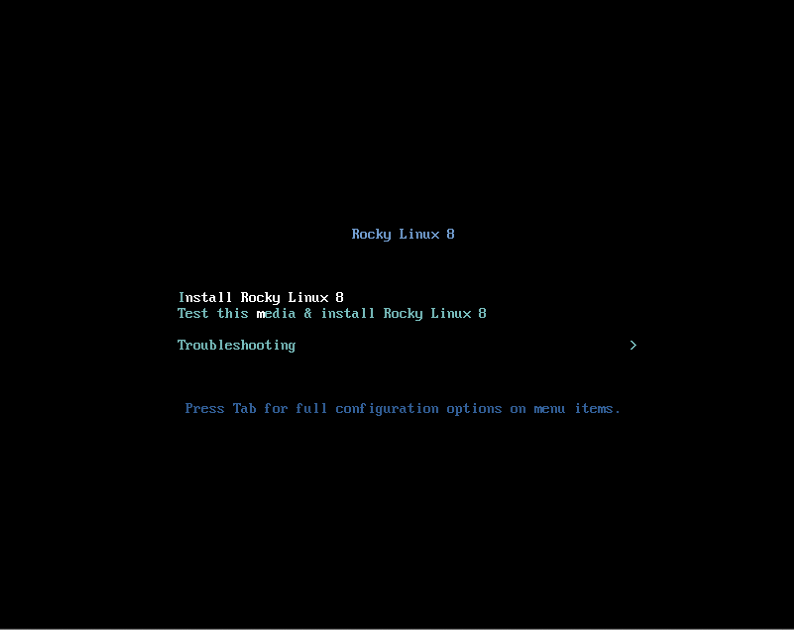
(补充:这里以使用 Rocky-8.5-x86_6-dvd1.iso 系统镜像为例)
(只在真机上执行以下步骤)
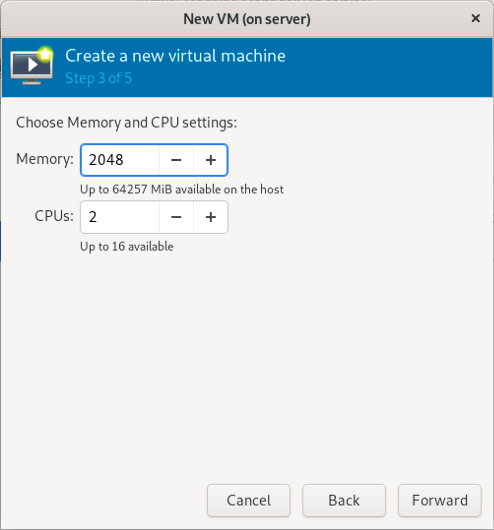
(补充:这里以设置 2048 MiB 内容和 2 核 CPU 为例)
(只在真机上执行以下步骤)
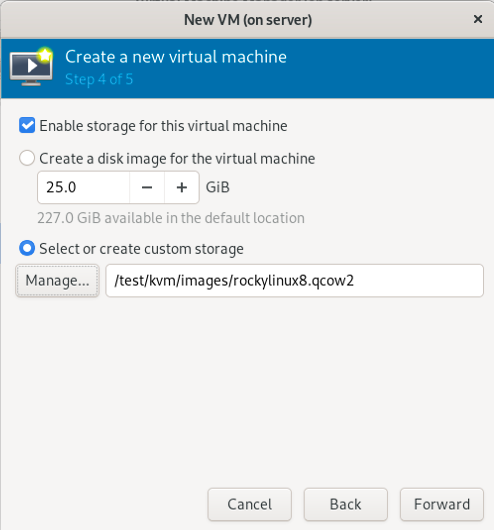
(补充:这里以使用 rockylinux8.qcow2 硬盘文件为例)
(只在真机上执行以下步骤)
(注意:虚拟网络必须提前创建好)
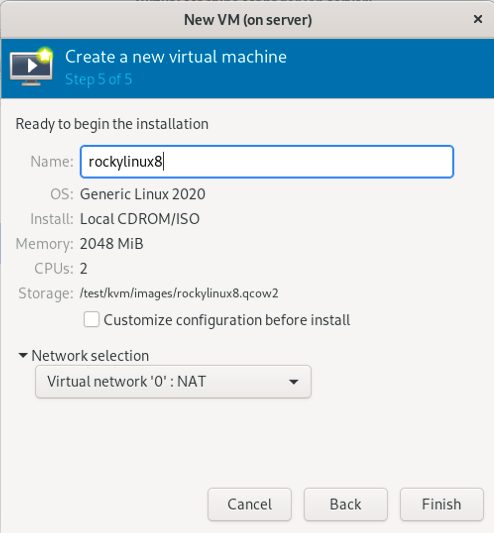
(补充:这里以将虚拟机命名为 rockylinux8 并使用 0 网络为例)
(只在真机上执行以下步骤)
(只在真机上执行以下步骤)
(只在真机上执行以下步骤)
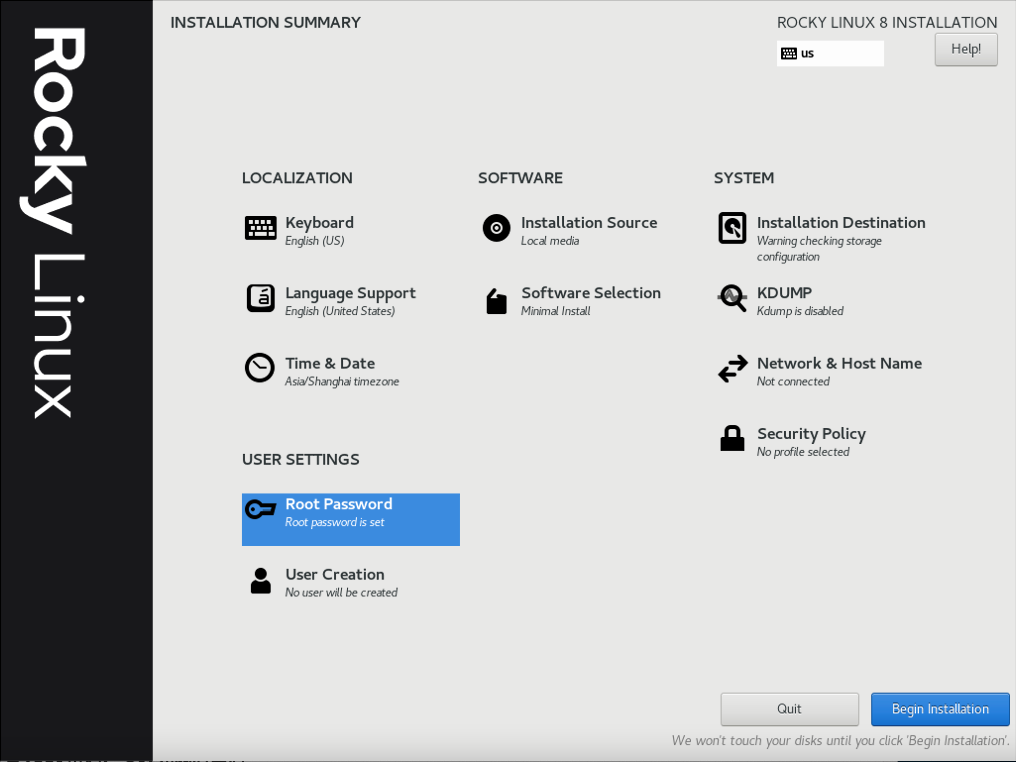
需要手动配置的地方有四个:
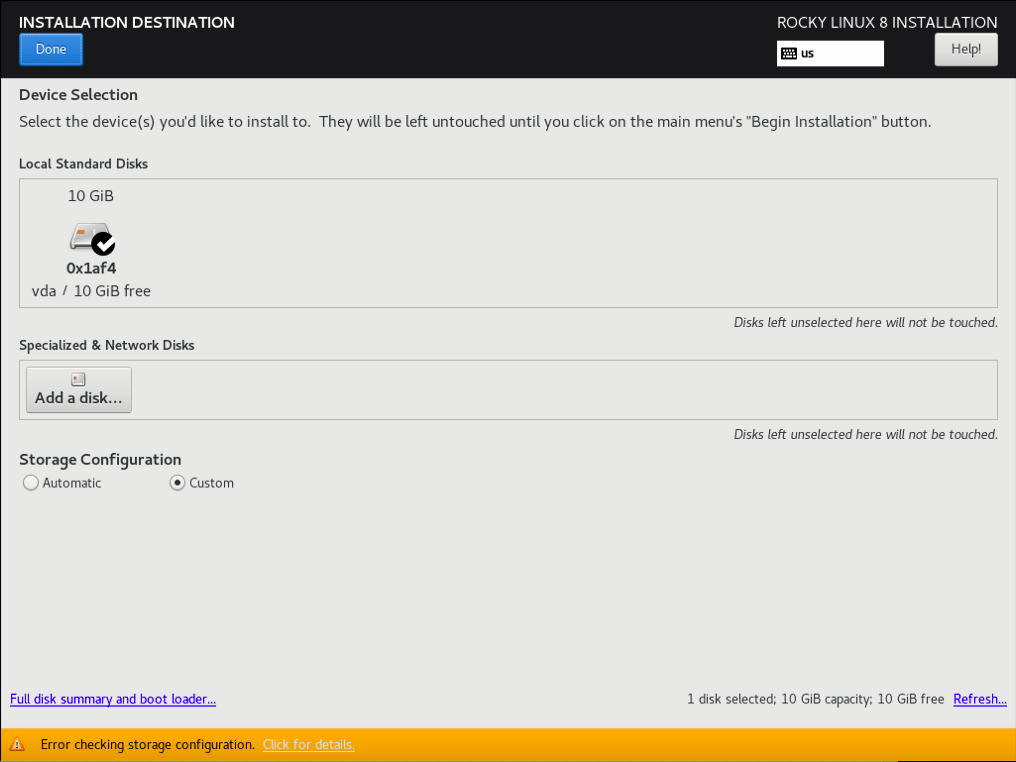
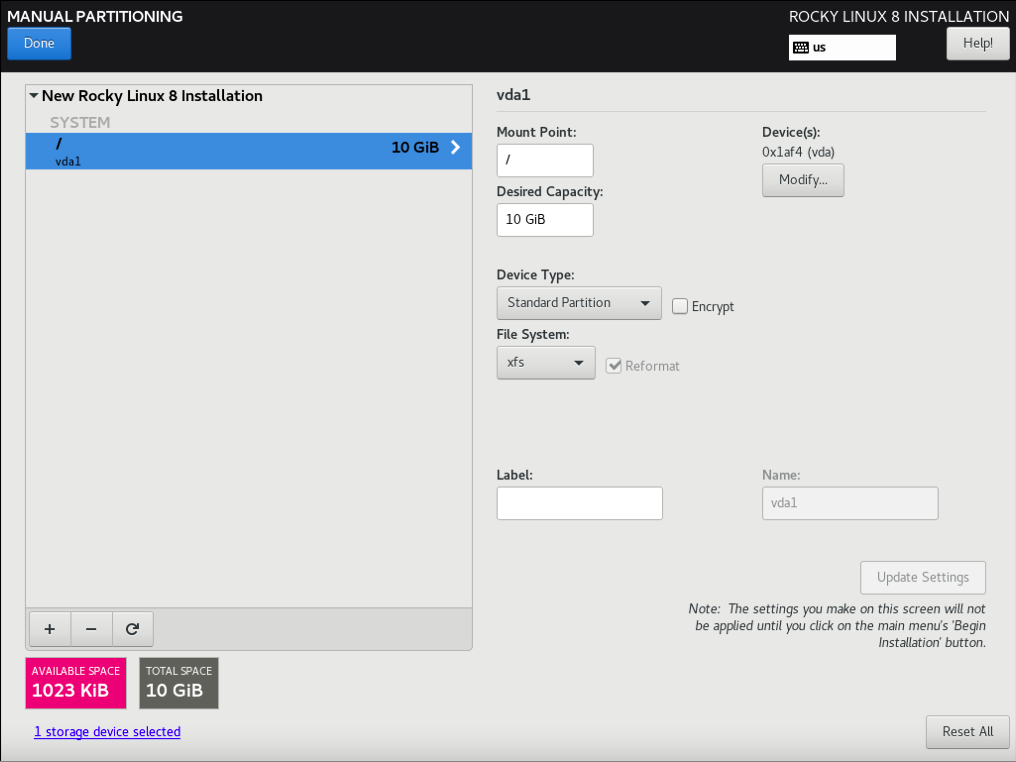
1) “INSTALLATION DESTINATION”
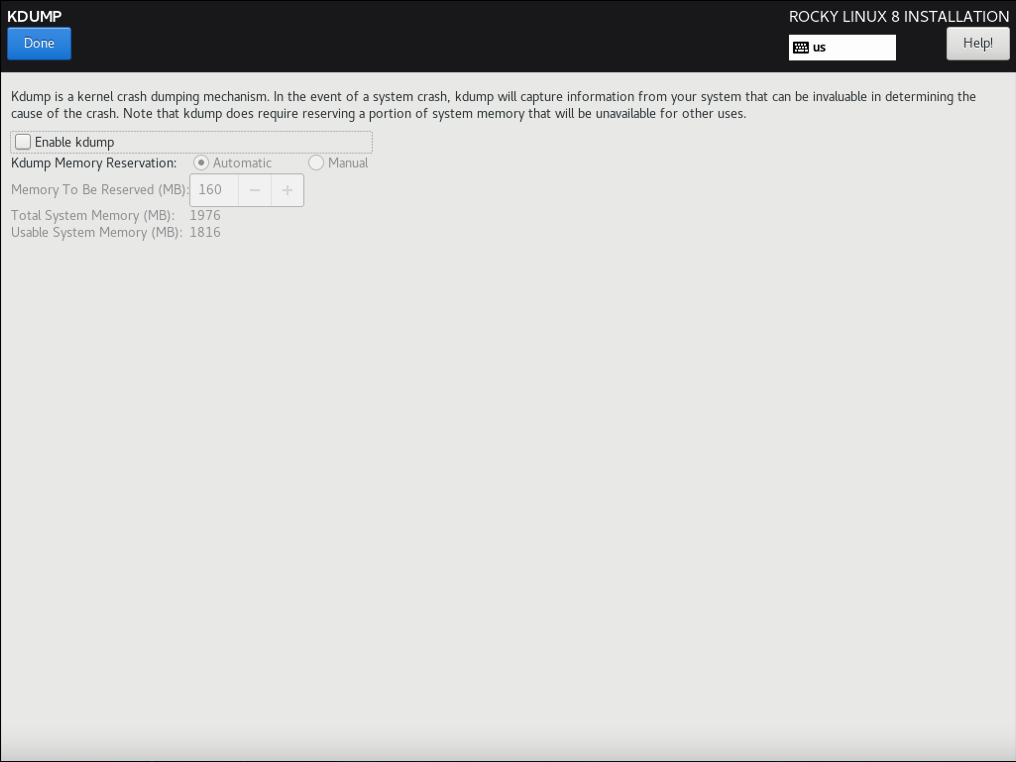
2) “KDUMP”
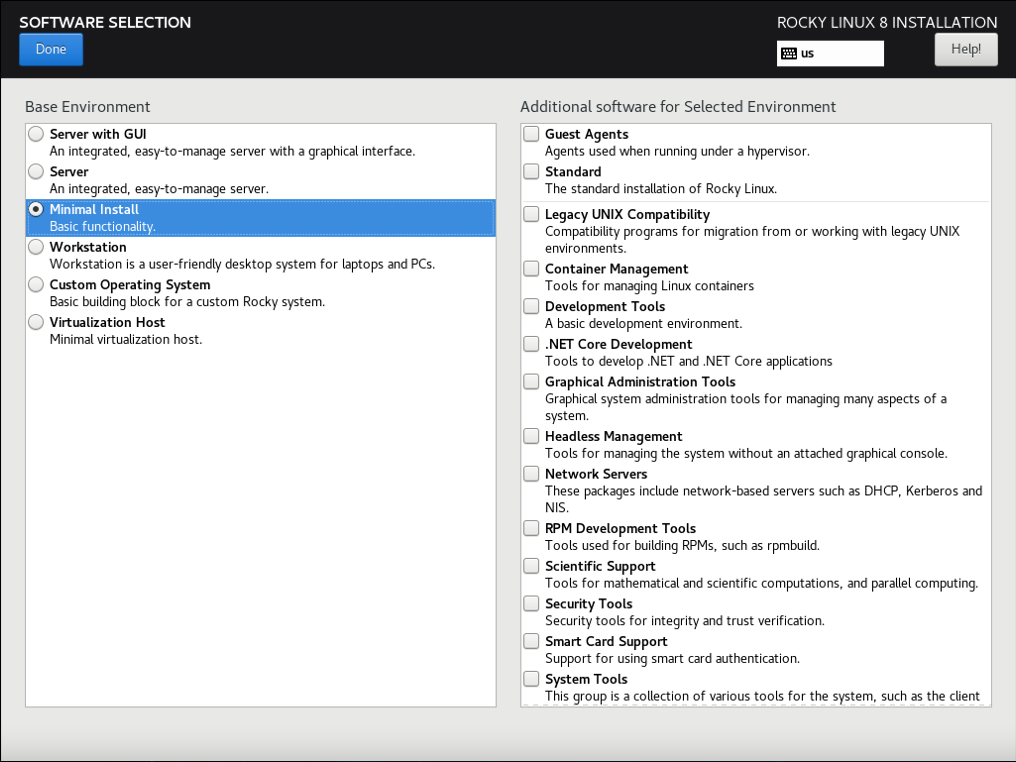
3) “SOFTWARE SELECTION”
4) “Root Password”
分别点击以后就可以配置了
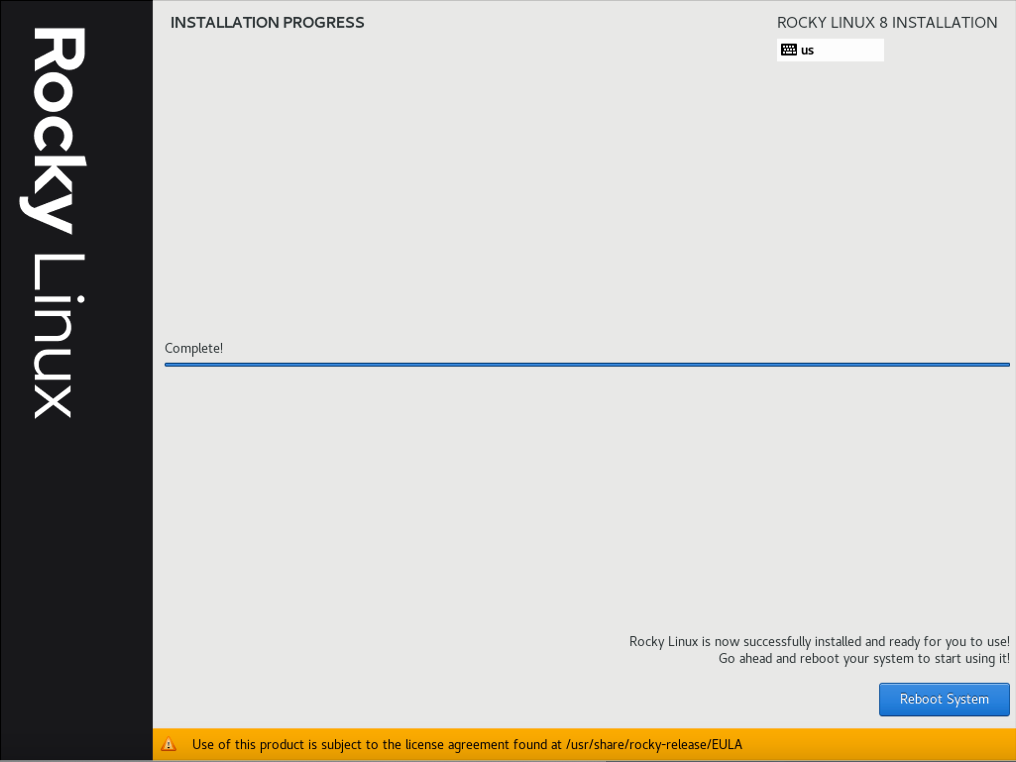
(只在真机上执行以下步骤)
(补充:完成后点击左上角的 “DONE”)
(注意:只分一个分区,只设置一个挂载点挂载到根,使用标准硬盘类型,硬盘格式设置为 XFS)
(只在真机上执行以下步骤)
(补充:完成后点击左上角的 “DONE”)
(只在真机上执行以下步骤)
(补充:完成后点击左上角的 “DONE”)
(只在真机上执行以下步骤)

(只在真机上执行以下步骤)
(只在真机上执行以下步骤)
(只在真机上执行以下步骤)
1) 一定要使用刚刚创建的 /var/lib/libvirt/images/rockylinux8.qcow2 作为安装虚拟机的硬件文件
2) 虚拟机网络 “0” 要提前创建好
3) 只分一个分区,只设置一个挂载点挂载到根,使用标准硬盘,硬盘格式是 XFS
4) 取消 “KDUMP”
5) 选择最小化安装系统
6) 设置 root 密码
(只在虚拟机上执行以下步骤)
# vi /etc/sysconfig/network-scripts/ifcfg-enp1s0将全部内容修改如下:
TYPE=Ethernet
BOOTPROTO=dhcp
NAME=enp1s0
DEVICE=enp1s0
ONBOOT=yes(只在虚拟机上执行以下步骤)
# reboot(只在虚拟机上执行以下步骤)
# vi /etc/selinux/config将全部内容修改如下:
# This file controls the state of SELinux on the system.
# SELINUX= can take one of these three values:
#     enforcing - SELinux security policy is enforced.
#     permissive - SELinux prints warnings instead of enforcing.
#     disabled - No SELinux policy is loaded.
SELINUX=disabled
# SELINUXTYPE= can take one of three values:
#     targeted - Targeted processes are protected,
#     minimum - Modification of targeted policy. Only selected processes are protected.
#     mls - Multi Level Security protection.
SELINUXTYPE=targeted(只在虚拟机上执行以下步骤)
# vi /etc/sysconfig/network将全部内容修改如下:
# Created by anaconda
NOZEROCONF="yes"(只在虚拟机上执行以下步骤)
# vi /etc/default/grub将全部内容修改如下:
GRUB_TIMEOUT=5
GRUB_DISTRIBUTOR="$(sed 's, release .*$,,g' /etc/system-release)"
GRUB_DEFAULT=saved
GRUB_DISABLE_SUBMENU=true
GRUB_TERMINAL="serial console"
GRUB_SERIAL_COMMAND="serial --unit=1 --speed=115200"
GRUB_CMDLINE_LINUX="biosdevname=0 net.ifnames=0 console=tty0 console=ttyS0,115200n8"
GRUB_DISABLE_LINUX_UUID="true"
GRUB_ENABLE_LINUX_LABEL="true"
GRUB_DISABLE_RECOVERY="true"(只在虚拟机上执行以下步骤)
# grub2-mkconfig -o grub(只在虚拟机上执行以下步骤)
# blkid
/dev/sda1: UUID="e76ed189-6d0f-49d5-8586-c5aae4bdc9b5" TYPE="xfs" PARTUUID="3d8377ef-01"
(补充:这里的 UUID 是: e76ed189-6d0f-49d5-8586-c5aae4bdc9b5)
(只在虚拟机上执行以下步骤)
# vi /etc/fstab将以下内容:
......
UUID=e76ed189-6d0f-49d5-8586-c5aae4bdc9b5 /                   xfs     defaults        0 0
(补充:这里的 UUID 是: e76ed189-6d0f-49d5-8586-c5aae4bdc9b5)
修改为:
/dev/sda1 / xfs defaults 0 0(只在虚拟机上执行以下步骤)
# yum -y remove firewalld-* python-firewall(只在虚拟机上执行以下步骤)
# yum -y update(只在虚拟机上执行以下步骤)
# yum install -y cloud-utils-growpart# chmod 755 /etc/rc.local(只在虚拟机上执行以下步骤)
# vi /etc/rc.local添加以下内容:
......
/usr/bin/growpart /dev/sda1
/usr/sbin/xfs_growfs /(只在虚拟机上执行以下步骤)
# vi /etc/hostname将全部内容修改如下:
rockylinux8(只在虚拟机上执行以下步骤)
# systemctl start serial-getty@ttyS0
# systemctl enable serial-getty@ttyS0(只在虚拟机上执行以下步骤)
# history -c(只在虚拟机上执行以下步骤)
# poweroff(只在真机上执行以下步骤)
# sudo virt-sysprep -d rockylinux8(补充:这里以清理 rockylinux8 虚拟机为例)
(
注意:如果此命令不存在
1) Rocky Linux 系统的话需要安装 libguestfs-tools
2) openSUSE 系统的话需要安装 guestfs-tools
)
(只在真机上执行以下步骤)
# ls -ld /sys/firmware/efi(补充:如果 /sys/firmware/efi 目录存在,则代表系统是 EFI,否则系统是 BIOS)
# [ -d /sys/firmware/efi ] && echo UEFI || echo BIOS在创建 KVM 虚拟机之前要先安装 KVM 并创建 KVM 虚拟网络
在 openSUSE 官网上下载安装系统所需要的镜像:
https://software.opensuse.org/distributions/leap
主要用于批量克隆出新的 KVM 机器,节约创建新虚拟机的时间
(只在真机上执行以下步骤)
# qemu-img create -f qcow2 /var/lib/libvirt/images/template_opensuse_leap_15_10g.qcow2 10G(补充:这里以创建 10G 大小的 template_opensuse_leap_15_10g.qcow2 硬盘文件为例)
(只在真机上执行以下步骤)
# ls /var/lib/libvirt/images/ | grep template_opensuse_leap_15_10g.qcow2(补充:这里以确认 template_opensuse_leap_15_10g.qcow2 硬盘文件为例)
(只在真机上执行以下步骤)
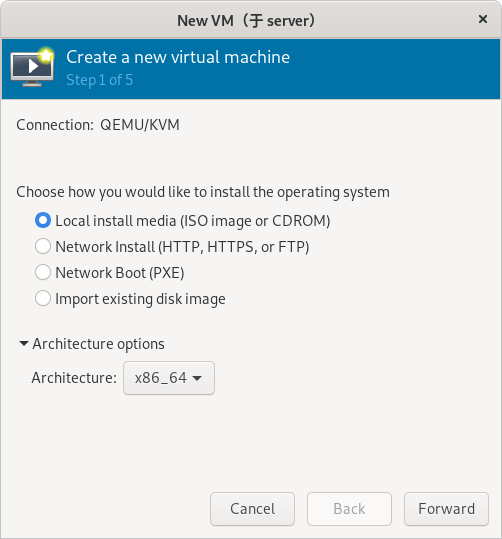
# virt-manager(只在真机上执行以下步骤)
(步骤略)
(只在真机上执行以下步骤)
(只在真机上执行以下步骤)
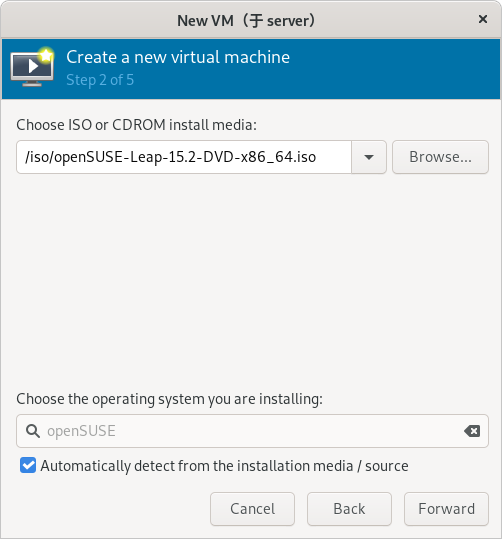
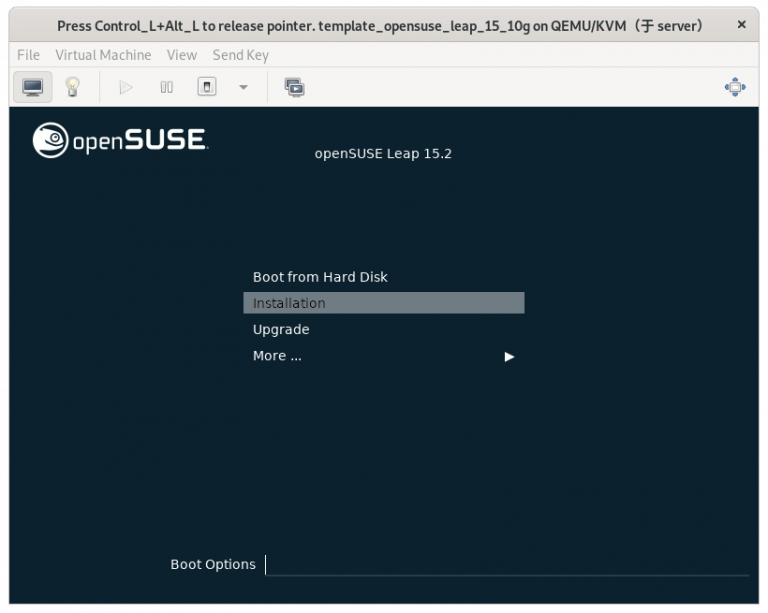
(补充:这里以使用 openSUSE-Leap-15.2-DVD-x86_64.iso 系统镜像为例)
(只在真机上执行以下步骤)
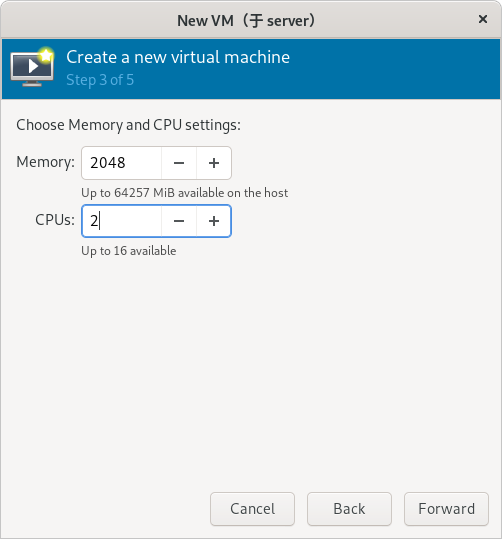
(补充:这里以设置 2048 MiB 内容和 2 核 CPU 为例)
(只在真机上执行以下步骤)
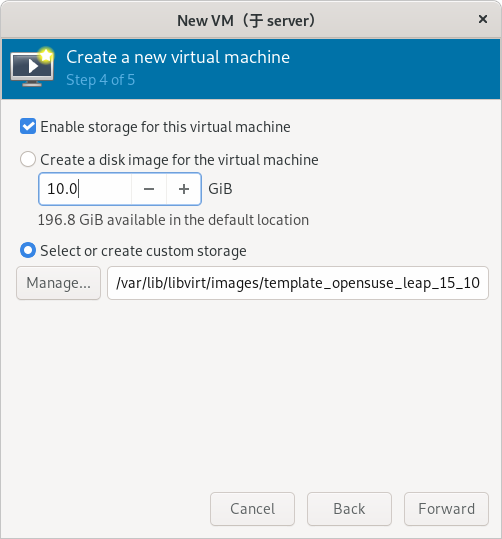
(补充:这里以使用 template_opensuse_leap_15_10g.qcow2 硬盘文件为例)
(只在真机上执行以下步骤)
(注意:虚拟网络必须提前创建好)
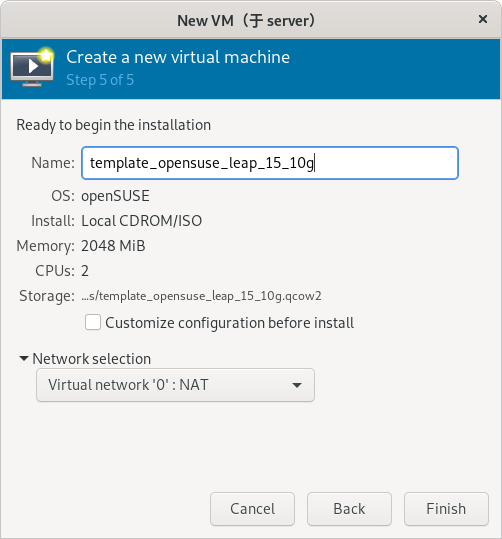
(补充:这里以将虚拟机命名为 template_opensuse_leap_15_10g 并使用 0 网络为例)
(只在真机上执行以下步骤)
(只在真机上执行以下步骤)
(只在真机上执行以下步骤)
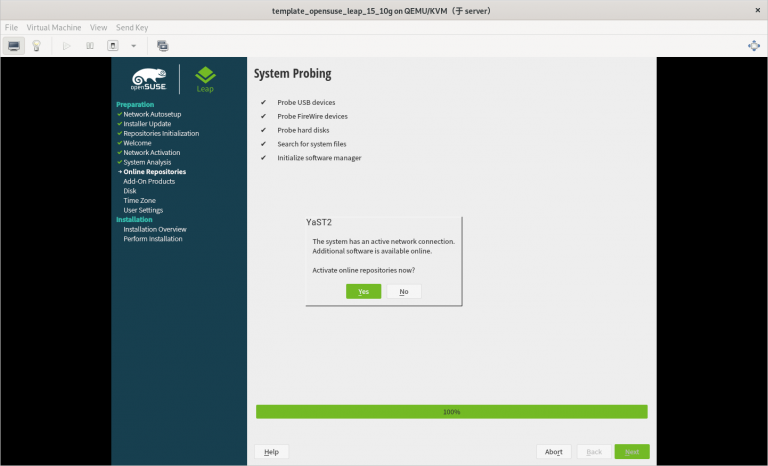
(只在真机上执行以下步骤)
(只在真机上执行以下步骤)

(只在真机上执行以下步骤)
(只在真机上执行以下步骤)
(只在真机上执行以下步骤)

(只在真机上执行以下步骤)
(只在真机上执行以下步骤)
(只在真机上执行以下步骤)
(只在真机上执行以下步骤)
(只在真机上执行以下步骤)

(只在真机上执行以下步骤)
(只在真机上执行以下步骤)
(只在真机上执行以下步骤)
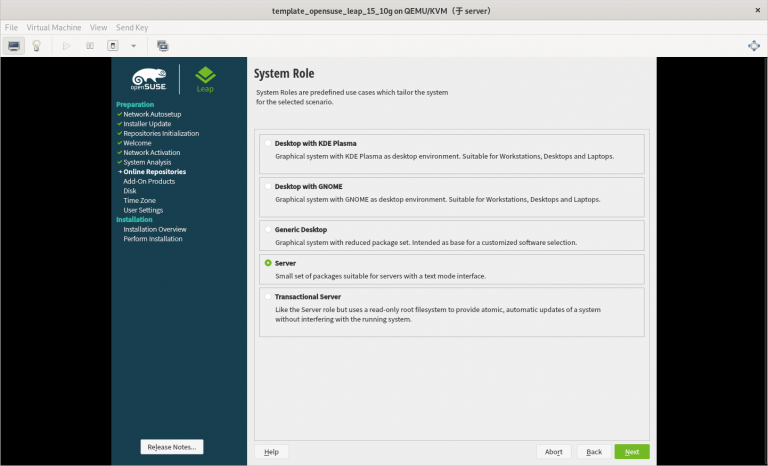
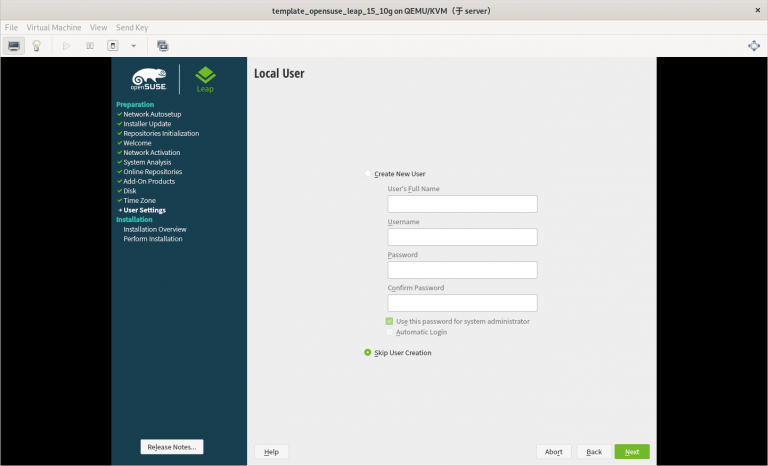
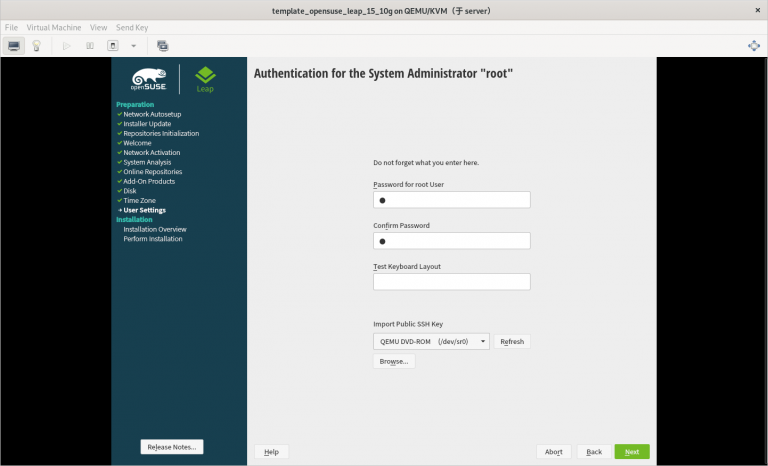
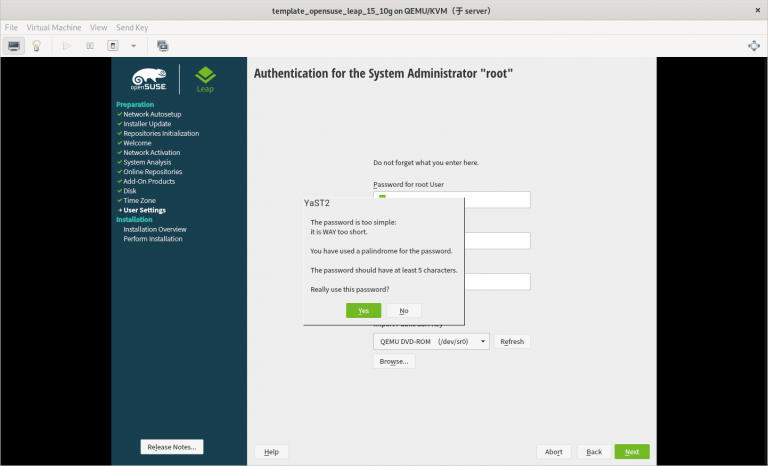
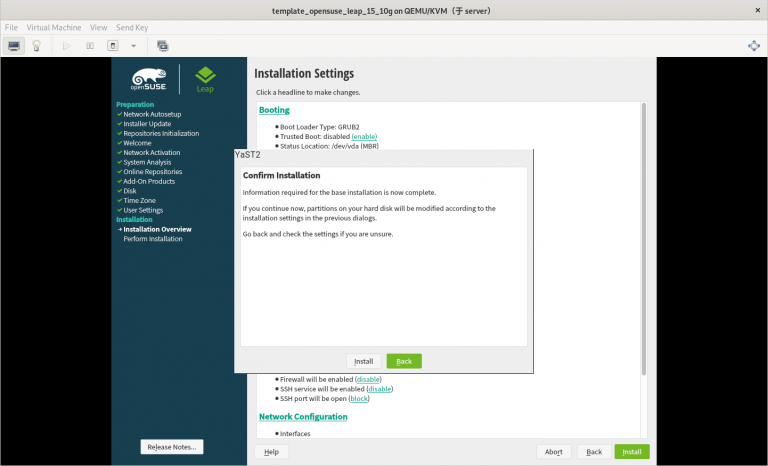
1) 一定要使用刚刚创建的 template_opensuse_leap_15_10g.qcow2 作为安装虚拟机的硬件文件
2) 虚拟机网络 “0” 要提前创建好
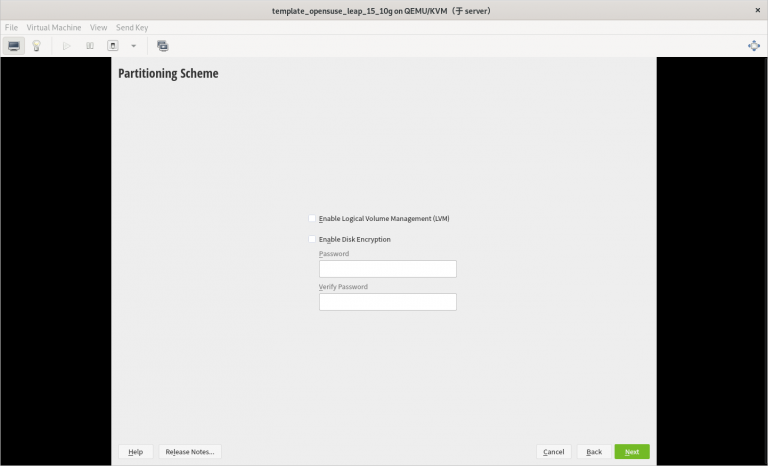
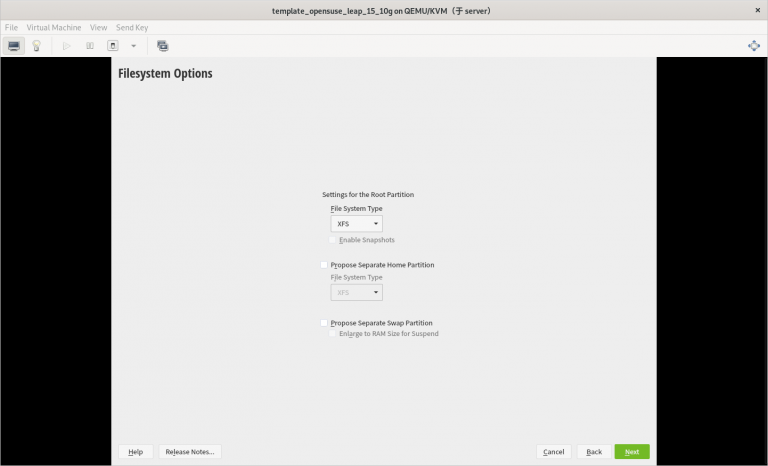
3) 只分一个分区,只设置一个挂载点挂载到根,使用标准硬盘,硬盘格式是 XFS
4) 选择最小化安装系统
(只在虚拟机上执行以下步骤)
# vi /etc/default/grub将全部内容修改如下:
# If you change this file, run 'grub2-mkconfig -o /boot/grub2/grub.cfg' afterwards to update
# /boot/grub2/grub.cfg.

# Uncomment to set your own custom distributor. If you leave it unset or empty, the default
# policy is to determine the value from /etc/os-release
GRUB_DISTRIBUTOR=
GRUB_DEFAULT=saved
GRUB_HIDDEN_TIMEOUT=0
GRUB_HIDDEN_TIMEOUT_QUIET=true
GRUB_TIMEOUT=8
GRUB_CMDLINE_LINUX_DEFAULT="splash=silent mitigations=auto quiet"
GRUB_SERIAL_COMMAND="serial --unit=1 --speed=115200"
GRUB_CMDLINE_LINUX="biosdevname=0 net.ifnames=0 console=tty0 console=ttyS0,115200n8"
GRUB_DISABLE_LINUX_UUID="true"
GRUB_ENABLE_LINUX_LABEL="true"
GRUB_DISABLE_RECOVERY="true"

# Uncomment to automatically save last booted menu entry in GRUB2 environment

# variable `saved_entry'
# GRUB_SAVEDEFAULT="true"
#Uncomment to enable BadRAM filtering, modify to suit your needs

# This works with Linux (no patch required) and with any kernel that obtains
# the memory map information from GRUB (GNU Mach, kernel of FreeBSD ...)
# GRUB_BADRAM="0x01234567,0xfefefefe,0x89abcdef,0xefefefef"
#Uncomment to disable graphical terminal (grub-pc only)

GRUB_TERMINAL="gfxterm"
# The resolution used on graphical terminal
#note that you can use only modes which your graphic card supports via VBE

# you can see them in real GRUB with the command `vbeinfo'
GRUB_GFXMODE="auto"
# Uncomment if you don't want GRUB to pass "root=UUID=xxx" parameter to Linux
# GRUB_DISABLE_LINUX_UUID=true
#Uncomment to disable generation of recovery mode menu entries

# GRUB_DISABLE_RECOVERY="true"
#Uncomment to get a beep at grub start

# GRUB_INIT_TUNE="480 440 1"
GRUB_BACKGROUND=
GRUB_THEME=/boot/grub2/themes/openSUSE/theme.txt
SUSE_BTRFS_SNAPSHOT_BOOTING="true"
GRUB_DISABLE_OS_PROBER="false"
GRUB_ENABLE_CRYPTODISK="n"
GRUB_CMDLINE_XEN_DEFAULT="vga=gfx-1024x768x16"(只在虚拟机上执行以下步骤)
# grub2-mkconfig -o grub(只在虚拟机上执行以下步骤)
# blkid
/dev/vda1: UUID="53ee2f87-89b8-4cd7-a4dc-0957d28f4831" TYPE="xfs" PARTUUID="3d8377ef-01"
(补充:这里的 UUID 是: 53ee2f87-89b8-4cd7-a4dc-0957d28f4831)
(只在虚拟机上执行以下步骤)
# vi /etc/fstab将以下内容:
......
UUID=53ee2f87-89b8-4cd7-a4dc-0957d28f4831 /                   xfs     defaults        0 0
(补充:这里的 UUID 是: 53ee2f87-89b8-4cd7-a4dc-0957d28f4831)
修改为:
......
/dev/vda1 / xfs defaults 0 0(只在虚拟机上执行以下步骤)
# zypper -n rm firewalld-*(只在虚拟机上执行以下步骤)
# zypper -n in growpart# vim /etc/init.d/after.local创建以下内容:
/usr/bin/growpart /dev/sda1
/usr/sbin/xfs_growfs /# chmod 755 /etc/init.d/after.local(只在虚拟机上执行以下步骤)
# zypper mr -da(只在虚拟机上执行以下步骤)
# zypper ar -fcg http://10.0.0.254/openSUSE-Leap-15/ lan(注意: http://10.0.0.254/openSUSE-Leap-15/ 需要根据真实环境的情况进行更改)
(只在虚拟机上执行以下步骤)
# zypper ref(只在虚拟机上执行以下步骤)
# hostnamectl set-hostname template_opensuse_leap_15_10g(只在虚拟机上执行以下步骤)
# systemctl start serial-getty@ttyS0
# systemctl enable serial-getty@ttyS0(只在虚拟机上执行以下步骤)
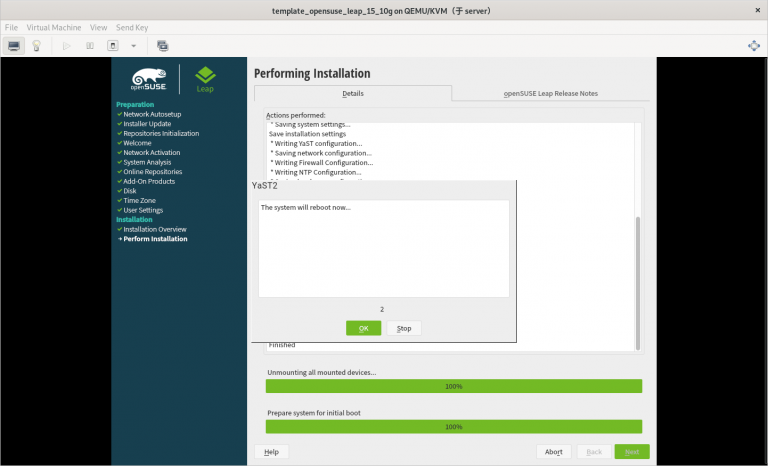
# history -c(只在虚拟机上执行以下步骤)
# poweroff删除配置文件里 cdrom 相关的部分
# vim /etc/libvirt/qemu/template_opensuse_leap_15_10g.xml删除以下内容:
......
    <disk type='file' device='cdrom'>
      <driver name='qemu' type='raw'/>
      <source file='/test/iso/openSUSE-Leap-15.2-DVD-x86_64.iso'/>
      <target dev='sda' bus='sata'/>
      <readonly/>
      <address type='drive' controller='0' bus='0' target='0' unit='0'/>
    </disk>
......(只在真机上执行以下步骤)